Bulk Fisheye Remapper
A tool I wrote to serve my own needs remapping raw fisheye photos to different projections. It is rather user unfriendly and only does exactly what I need it to. You have been warned.
It is currently mostly hardcoded to:
- a crop factor of 1.5 (Nikon DX APS-C). It will probably do ok with Canon’s 1.6 factor cameras, but if you have a full frame or other ratio camera, you’re out of luck.
- an 8mm fisheye for said camera, i.e. clipped circular images. If your fisheye lens is full frame or fully circular, it again probably doesn’t work.
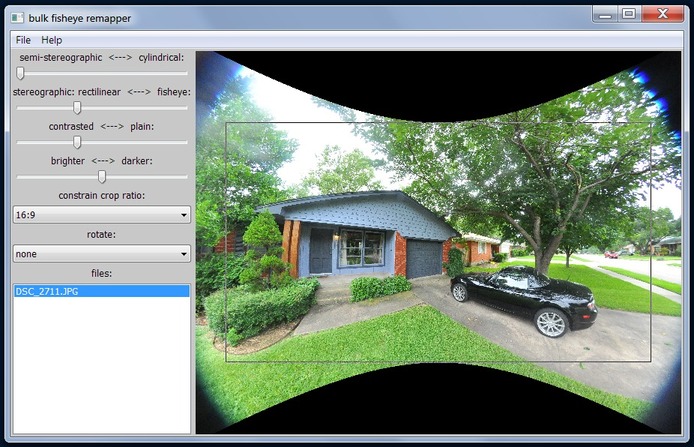
In short, if your camera produces images that look like this:
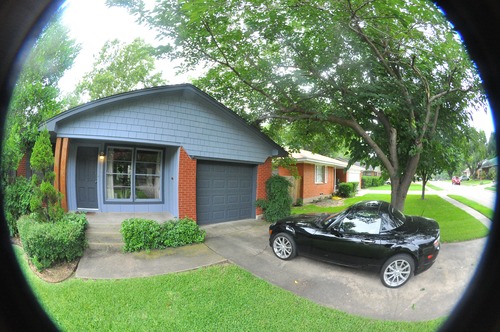
then this tool can work for you.
It can map a fisheye projection to rectilinear, stereographic and cylindrical, but more interestingly, to any possible blend between those. In particular, I like stereographic with a bit of rectilinear blended in, as it reduces fisheye artifacts (roundness) while still avoiding rectilinear artifacts (stretching).
From the original above:
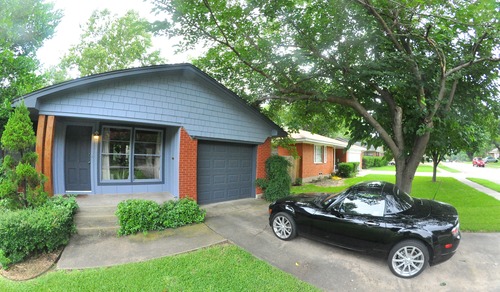
- stereographic: this is very similar to fisheye, but reduces the bulgy look of the original a little: notice how the back wheel of the car looks less squashed than the original. You’d choose this to improve on pictures for which you want to keep the fisheye look, as it does the least amount of damage to your pixel resolution.
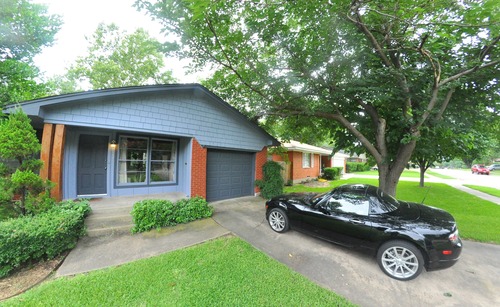
- rectilinear: this is the projection a “normal” protographic lens does, taken to the wideangle extreme. Stretching is really bad, and pixel resolution suffers. Any physical lens would normally only be able to show a small center crop, and if you crop with this tool, good results can still be had. Recommended for subjects where round lines are undesirable such as architectural shots.

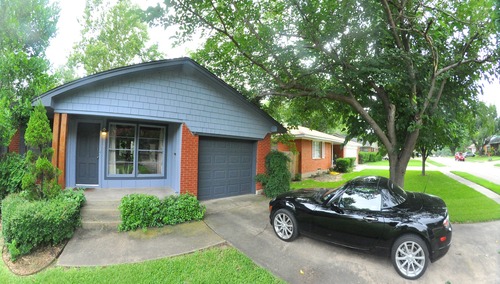
- rectilinear-stereographic: this is a blend between the above two, and the ultimate compromise between bulging and stretching. Notice how the back wheel looks properly round for the first time. You can choose any blend between the two.
- cylindrical: another option, which is essentially rectilinear vertically and fisheye horizontally. Works well for panoramic images that are very horizontal and cropped to 2:1 or 3:1 size.
How the tool works:
The “bulk” in the title refers to the fact that it is set up to load a set of images at once, and once you have tweaked the parameters, remaps and saves all of them out automatically. I often take a hundred or so shots on a trip, so the usual load -> modify -> save cycle of most apps is unacceptable (I used Hugin before I wrote this app, which is fantastic in many ways, but the amount of clicks per photo drove me crazy).
Use the menu to load a set of photos. Click on each photo to modify the parameters and set the crop box. Once done, “remap and save all” does as advertised, saving out a copy of the original photo with a prepended “_“.
After each modification with the options below, the tool re-renders the preview. This may be slow depending on your computer, if you want it faster the only way is to work in a smaller window :) The preview doesn’t use super sampling for speed, so may look a bit jagged, but the final output is computed using 3x3 super sampling so looks pretty good.
The first slider controls “cylindricalness”. Put it to the right for a cylindrical projection, or to the left to let the second slider determine the projection.
The second slider blends between a rectilinear projection (to the left) and stereographic/fisheye (to the right).
Where you put the sliders depends on the subject and quality requirements, see above examples. Experiment.
The next sliders are there for convenience so you mostly don’t have to post process photos in other applications, saving more time.
Contrasted vs Plain and Bright vs Dark both only do very subtle changes, as I prefer to keep my photos as close to original as possible color wise. The underlying formulas are a bit different from photoshop et al, trying to do the least damage to the colors.
Constrain crop ratio is useful if you want to create images that are all alike. It is important that you set the cropping for each image by clicking near a corner inside the image. The cropping is always centered and forced to be inside the image boundaries for speed.
Rotate, again useful so you don’t have to do this manually afterwards.
Use the mousewheel to zoom the image in & out.
There is no resolution setting. Since the image gets resampled and pixels distributed, you are going to lose some effective resolution from what your CCD delivered. The tool automatically picks a resolution that it thinks is appropriate, which is usually a bit less than input image, and relative to how big the cropped region is on the preview. So if you want maximum resolution output, make sure to zoom the image such that the crop box is as big as possible, or if the original is already blurry and you want to save disk space, you could zoom out a bunch :)
If you have a lot of photos for which you want basically the same parameters, there is a primitive way to change the defaults: load an “average” photo, set the parameters, choose “set defaults” from the menu, quit and restart the app, and load the set of photos. Each photo’s default settings will now be changed.
WARNING: Be aware that unlike some of my other software which have a great level of polish, this tool is just a raw tool for personal use that happens to fit my workflow. I am putting it out there to make a few people happy for which it happens to work. Be sure to have read the above in detail before you download.
I may decide to make a friendlier version some day if it makes commercial sense. Until then, don’t expect any changes, so don’t go email me to make it work with your camera or something :)
If you want to see more examples of what this tool can do, pretty all recent wide angle looking photos on this blog are made with this tool.